How to Draw Cool Hair
Pilus is very difficult to draw, considering what we see is unlike than what nosotros know. Y'all can't just draw all the hairs in the form of lines, considering that'due south not what we run into when we look at hair. What we run into must exist simplified to lines and shades, and there are many ways to exercise it.
In this tutorial, I volition show y'all one of these means—a uncomplicated method that's great for quick rendering and sketches. I will nowadays this method on four examples: long straight hair, short hair, wavy pilus, and afro-textured hair.
Before You Kickoff
To follow this tutorial, you lot'll demand some kind of caput base. You lot can apply mine, or create your own in some other style.


Let'due south take a look at existent hair to prepare for this tutorial:
- Long, straight hair
- Short hair
- Wavy hair
- Afro-textured hair
1.How to Draw Long, Straight Hair
Step ane
Start by adding some volume around the caput. Hair shouldn't lie flat on the scalp!


Pace 2
Describe the parting in your chosen place.


Step 3
Draw the outline of the hair effectually the confront.


Step 4
Draw the direction of the hair gently flowing downwardly over the shoulders. Go on in mind that you're not drawing the single hairs hither, merely their menses.


Step v
As I've mentioned before, hair doesn't lie flat on the scalp. Prove it past elevating the forepart.


Step vi
Pilus is grouped in strands, and that's what we see. Create skewed edges of such strands.


Pace 7
Each strand tin can exist divided into smaller strands.


Pace 8
The strands nosotros'll exist partially visible on top of the head every bit well.


Step 9
Draw some strands on the side, too, to add some texture. Don't draw them as uncomplicated straight lines, just rather as narrow "Y" shapes (normal and upside down).


Step x
Brand the hair elevated along the parting.


Step 11
Outline the whole hair, following the rhythm of strands. Don't press too hard—hair is soft and shouldn't accept a difficult outline.


Step 12
Describe long lines along the strands. This will give the hair some particular and add together depth to the whole haircut. Don't press too hard, and don't make the lines also tight.


Pace 13
Shade the pilus now, thinking in terms of strands, not single hairs.


Step 14
Add together some devious hairs here and at that place to make it expect more realistic.


2. How to Depict Brusque Hair
Step 1
Over again, draw some volume effectually the head. In this case it volition also be the outline of the whole haircut.


Step 2
Draw the parting and the fringe going straight from it.


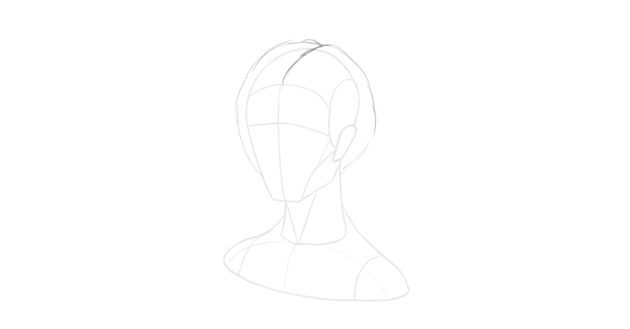
Step 3
Brand the general outline complete by cartoon the hairline side by side to the ear.


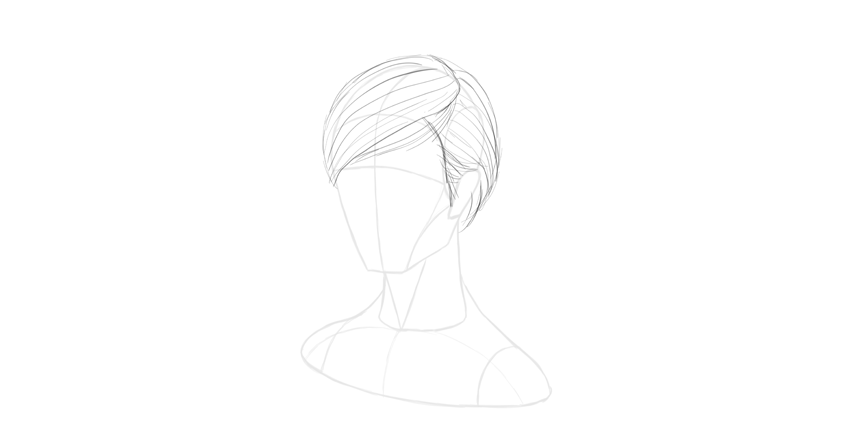
Step 4
Draw the direction of the hair, creating the 3D grade of the haircut.


Step five
Some stray strands may appear in the fringe. Draw their edge...


... and so their shape going towards the parting.


Step 6
Define the strands on the sides of the head.


Stride 7
Draw some shadows between strands in the middle also.


Step eight
Gently outline the hair without drawing lines that are too thick. All the lines should be tapered.


Step 9
Gently shade the strands.


Step x
You tin add some stray hair to arrive more than natural.


iii. How to Draw Wavy Hair
Pace 1
Depict the volume of the hair effectually the head. Wavy pilus is oft quite full and elevated.


Step 2
Draw the parting.


Step 3
Draw the outline of the strokes surrounding the face.


Stride four
Brand the hair seem elevated by filling the area betwixt it and the scalp.


Pace 5
Add gentle waves above the first strand-lines without touching them.


Step 6
Create more waves post-obit the same rhythm. These waves shouldn't touch each other.


Step vii
Shut the shape of each strand by mirroring its wave and adding a pointed tip.


Footstep 8
Depict some more than thin tips on the lesser of the haircut. Their curl should complement the other waves.


Stride 9
Draw the shape of the strands on top of the head.


Step 10
Draw the direction of the strands all over the head. Do it lightly.


Step 11
Each strand should exist divided into more strands at the tips.


Step 12
Make the strands on tiptop of the head more detailed.


Step 13
Outline the whole hair without making the waves too obviously split.


Step xiv
Shade the strands and the spaces between the waves.


Step 15
Give a strong outline to the hair, keeping it soft.


Step sixteen
Add some stray hair here and there.


4. How to Draw Afro-Textured Hair
Step 1
Draw the outline of the book of the hair. This fourth dimension it will take a lot of volume.


Footstep ii
Afro-textured pilus has a lot of curly strands and texture. Sketch "clouds" of strands all around the head.


Stride 3
Sketch the curly outline of the whole haircut.


Step 4
The hair around the face volition have the same shape.


Step 5
Gently sketch the general direction of the hair. Perspective is important here!


Footstep 6
Imagine each direction line is a branch of a tree. Add together the "leaves".


Stride 7
Add strands of hair in the form of piffling springs all around the caput. This volition create a dainty, non-uniform outline.


Footstep eight
Draw bigger curls inside the outline, following the direction you've established before.


Pace 9
Shade the hair in a very general way—just to testify it doesn't have a flat surface.


Step x
Shade the whole haircut now, cartoon curls all around. This volition create the texture nicely.


Step 11
Shade the haircut in a more than definite fashion, drawing shadows between groups of curls.


Step 12
To brand the haircut less round, you can add thicker curls here and there (describe a spring, and and then draw over it again).


Good Chore!
Now you know how to draw four unlike hairstyles. If you want to learn more about creating hair in different techniques, endeavour these tutorials likewise:


schmidtbobloventold.blogspot.com
Source: https://design.tutsplus.com/tutorials/how-to-draw-hair-step-by-step--cms-28970
0 Response to "How to Draw Cool Hair"
Post a Comment